Endless Runner Plugin Documentation
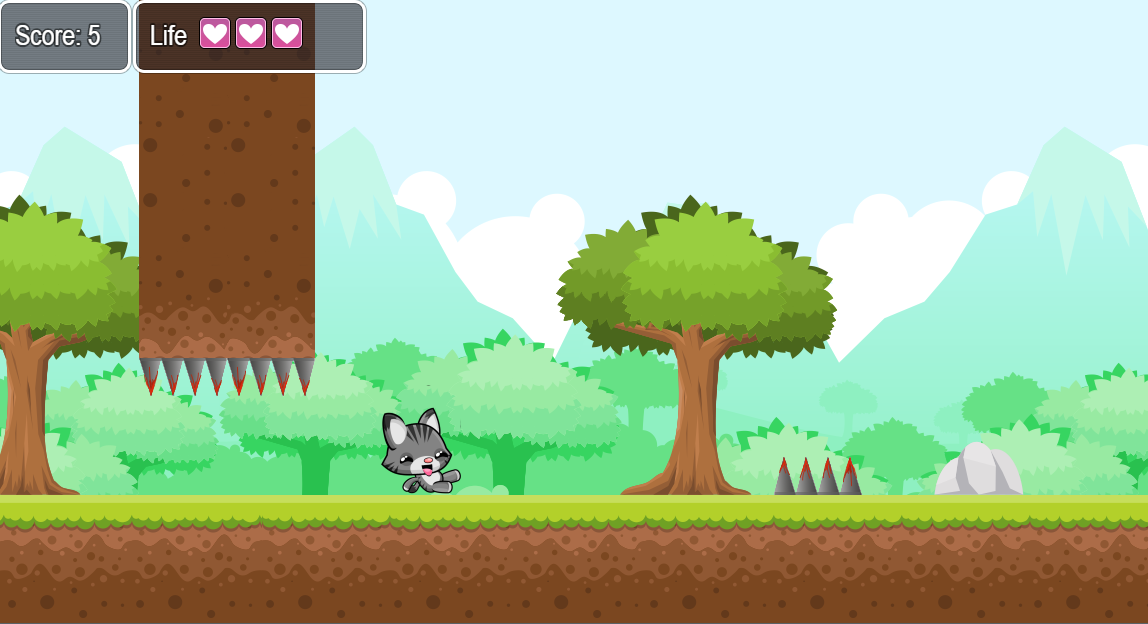
An endless runner! Duck or jump over obstacles to earn points in this mini-game plugin for RPG Maker MV. Give your players a chance to unwind from saving the world and let them have fun in this easy-to-use mini-game.
Getting Started
To kick off your project, follow these essential steps:
1. Install the Plugin:
- Copy and install the plugin to your
js/pluginsdirectory.
2. Organize Your Assets:
- Gather all the necessary assets (images, sounds, etc.) and place them in the
img/directory.
Now, let's dive into the core steps:
Step 1: Character Spritesheet Setup:
- Prepare your character's spritesheet. It should include animations for regular movement, jumping, ducking, dashing, and death.
- Customize frame dimensions, max frames, and animation speed in the plugin's parameters.
Step 2: Level and Obstacle Setup:
- Design and configure game levels, including background images, obstacles, background objects, collectibles, and music.
- Tailor the difficulty progression for each level to create a unique experience.
Step 3: Creating Events and Using the Plugin Command:
- Create in-game events or scenes that trigger the mini-game.
- Utilize the plugin command
Endless Startto initiate the endless runner experience.
Important Note:
- Be sure to select the character spritesheet image, as failing to do so may lead to game crashes.
For in-depth guidance on each step, refer to the remaining sections in this manual.
Character Sprite Setup
When setting up your character sprite, ensure it includes animations for normal movement, jumping, ducking, dashing, and death. You can customize various aspects in the plugin's parameters:
![]()
Frame Width & Height:
- This determines the size of each frame. You can freely create both large and small characters and adjust the frame size to ensure it's correctly rendered in the game.
Max Frame:
- This defines the maximum number of frames per animation pose.
Animation Speed:
- Specify the speed at which the animations play.
Poses:
- Poses are essentially rows of frames that define a complete animation. For example, jumping is one pose, sliding is another, and so on. Depending on your spritesheet, you may need to adjust each row to correspond to different poses.
Example Spritesheet:
![]()
Customize your character sprite's animations to make your game visually engaging and interactive.
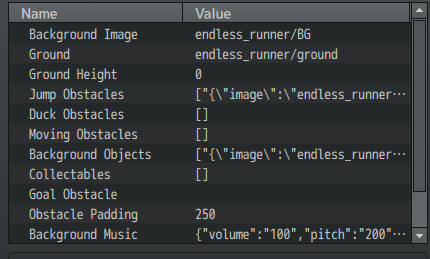
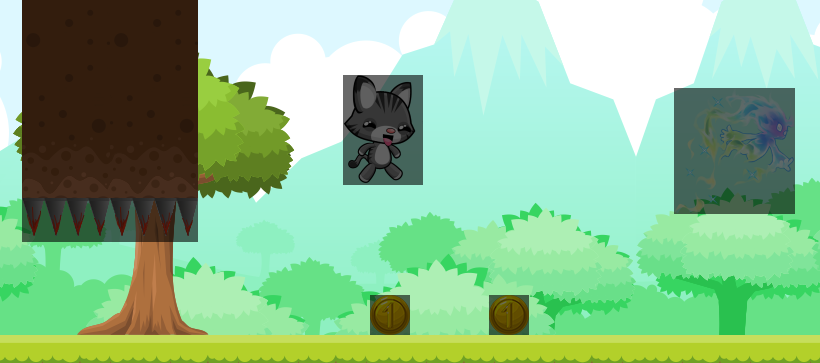
Levels
Levels serve as containers holding various elements, including background images, obstacles, background objects, collectibles, music, and the difficulty progression.
Your primary focus, in terms of configuration, will revolve around setting up each level to provide a unique gaming experience. Here's what you need to know:
Changing Levels: To switch to a different level, adjust the level variable in the plugin's parameters. Set the variable's value to the desired level you want to load when entering the mini-game scene.
Ground Image:
- The ground image determines the surface upon which the player sprite moves.
Ground Height:
- You can adjust the ground's height here, but keeping it at 0 will position the player at the very top of the image.
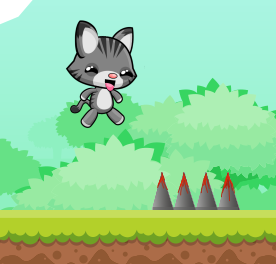
Jump Obstacles:
- These are obstacles that players need to jump over. They are placed on top of the ground image, similar to the player. Successfully passing them earns the player a score boost.
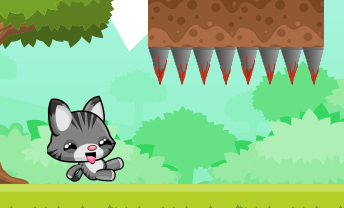
Duck Obstacles:
- These obstacles require players to duck underneath them. They are positioned at the top of the screen. Just like jump obstacles, passing them adds to the player's score.
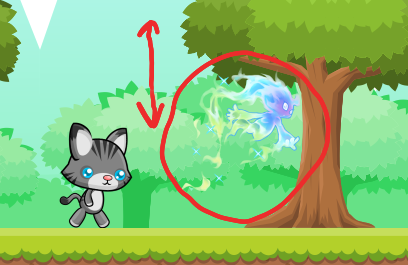
Moving Obstacles:
- These obstacles move vertically, going up and down during gameplay. They start at the top and move down to the ground before rising again. Passing these obstacles successfully also contributes to the player's score.
Background Objects:
- These decorative elements appear behind other obstacles. They are positioned on the ground, similar to jump obstacles or the player. Background objects don't affect the player's health or trigger collisions; they are purely for decoration.
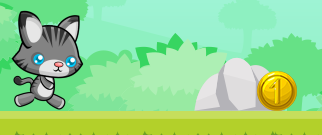
Collectibles:
- Collectibles are similar to regular obstacles but with additional functionality. They execute a list of script calls that can either harm the player or boost their life. The specific effects are defined in the actions list of the collectible.
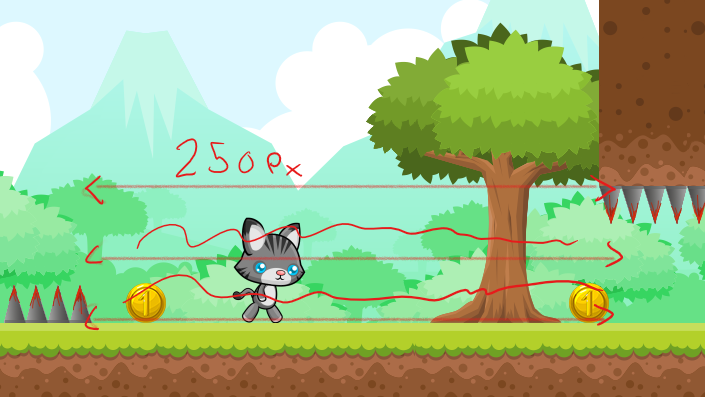
Obstacle Padding:
- Obstacle padding ensures that jump, duck, and moving obstacles don't overlap. The value is specified in pixels. For example, setting it to 200 pixels ensures each obstacle has approximately a 200-pixel gap between them.
Configure these elements to create diverse and engaging levels for your game.
Setting Up An Obstacle
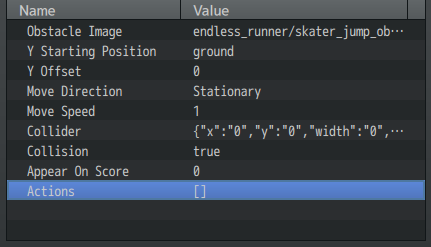
Obstacle Image:
- This is the image used for the obstacle.
Y Start Position:
- Determines where the obstacle begins on the Y-axis. It's possible to override the default positions for jump and duck obstacles, although it's generally not recommended.
Y Offset:
- Use this option to make minor adjustments, ensuring that the obstacle aligns correctly with other elements.
Move Direction:
- Specifies whether the obstacle remains stationary or moves up and down.
Move Speed:
- This controls the speed at which moving obstacles go up and down. Please note that this setting is only relevant for obstacles that aren't marked as "Stationary."
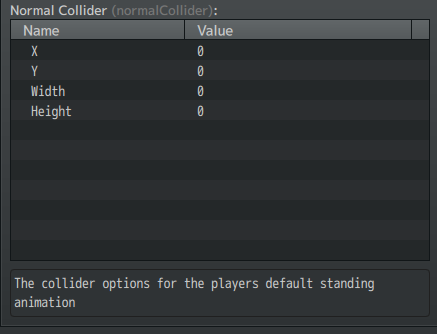
Collider:
- Adjusts the collision box around the obstacle. Useful for ensuring that unique graphics align correctly during collisions.
Collision:
- This setting allows you to enable or disable collisions for this obstacle, determining whether it affects the player.
Appear On Score:
- Defines the score threshold players must reach for the obstacle to appear in the scene.
Actions:
- This section contains an action list where you can define script calls that execute when specific events occur, such as player collision with the obstacle. For more details, see "Creating Action Lists."
Setup Level Progression
Level progression is crucial for adjusting the game's difficulty as players progress. If you want the level to become more challenging as the player reaches a specific score, follow these steps:
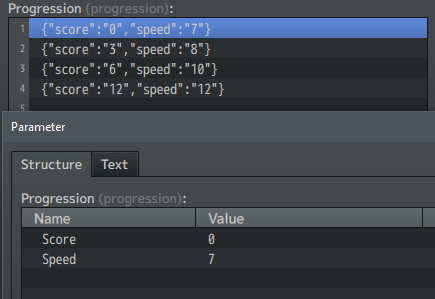
This is a basic setup. You need to do the following:
- Set the score threshold.
- Specify the speed increase that occurs when the player reaches that score.
- This also allows you to set the default movement speed when the level begins. Simply set the score to 0 and the speed to the desired value for the player's initial movement speed.
Tracking A Win or a Loss
To monitor whether a level has been won or lost, use the "Level Win Variable" parameter:
Level Win Variable:
- This variable ID stores information about whether the level was won (returns true) or lost (returns false). It helps track the level's outcome.
Tracking The Score
To keep track of the final score before a player wins or loses, use the "Level Score Variable" parameter:
Level Score Variable:
- This variable ID stores the final score achieved during the level. It's updated each time a game over or win occurs within the level.
Creating Action Lists
Action lists are collections of script calls that trigger when specific events happen. For instance, they can be used when the player dies, gets hit by an obstacle, or collects an item.
Customize your action lists to enhance the gameplay experience.
Action List Method Types
Action list methods can be used by employing any of the following methods:
-
moveUpDown(maxHeight, upSpeed, downSpeed) This method moves the character sprite upwards and then back down, resembling the style of the classic Sonic The Hedgehog games.
-
flash(flashSpeed) The flash method rapidly alternates the player sprite's opacity, creating a flickering effect.
-
addLife(value) Use this to increment the player's current number of lives by 1.
-
setLife(value) This method allows you to specify the exact number of lives the player should have. For instance, setting it to 1 ensures the player has only one life remaining.
-
custom(script) The "custom" method is for executing default RPG Maker MV script calls safely. To use a custom script call, wrap your code in a custom tag, similar to the example below:
custom($gameVariables.setValue(1, true))
Collision Box Customization
If your mini-game uses unique graphics, you may need to tailor the collision boxes for each obstacle and the player.
Debugging Collision Boxes
For ease in adjusting your collision boxes during playtesting, enable "Debug Collision Boxes" to visualize the boxes surrounding each obstacle and the player.
Plugin Commands
There is a single available plugin command used to initiate the mini-game's scene:
Endless-Runner Start
Use this command to commence the mini-game within your game.
Terms Of Use
For detailed information regarding the terms of use, please refer to our Terms Of Use.
You are permitted to:
- Utilize them in both hobby and commercial game development projects without limitations.
- Modify, adapt, and create derivative works for use in your own hobby or commercial game development projects.
You are not permitted to:
- Trade or sell any code contained within the plugin files.
- Duplicate the plugin(s) for distribution, sale, or trade to unauthorized consumers.
- Adapt or copy code for use in your own distributed plugin(s).
Support
If you require support, please do not hesitate to reach out to us via email at [email protected].
Alternative Methods for Support (Not Always Available)
We provide various methods for seeking support and assistance. However, please note that not all methods may be available at all times:
- Discord Server: Join our Discord Server.
- Twitter: You can also reach out to us on Twitter via @ltngames.
- RPG Maker Web Forums: Visit our dedicated RPG Maker Web Forums for community discussions and support.
Bug Reports
Efficiently report any bugs or issues you encounter through our online bug reporting form. We kindly request that, if your problem pertains to a bug, you use this method for reporting rather than contacting us via email.